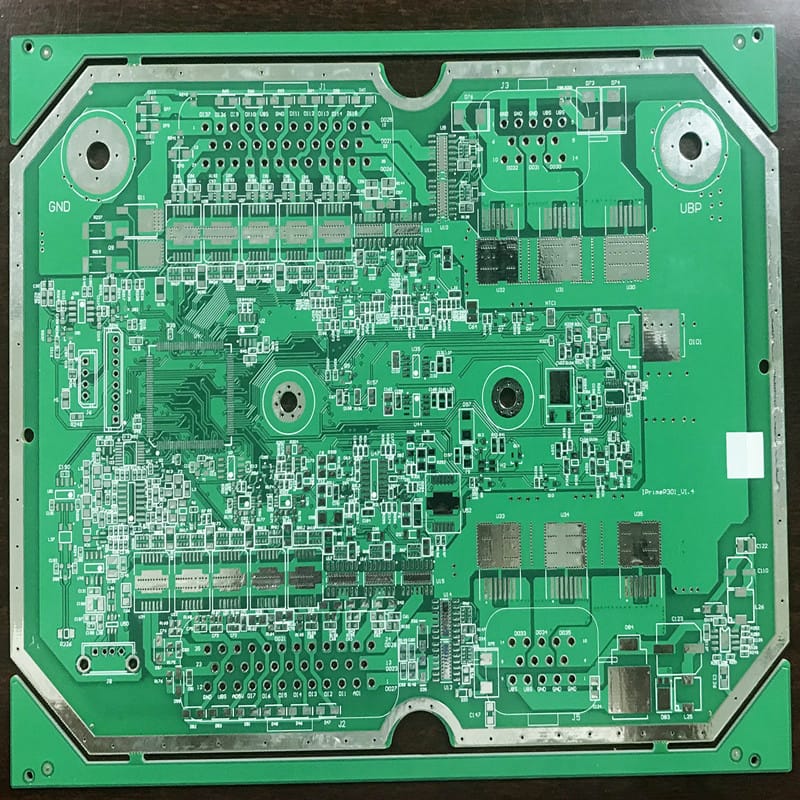
For a lot of reasons, home etching of PCBs is somewhat of a dying art. The main reason is the rise of quick-turn PCB fabrication services, of course; when you can send your Gerbers off and receive back a box with a dozen or so professionally made PCBs for a couple of bucks, why would you want to mess with etching your own?
Convenience and cost aside, there are a ton of valid reasons to spin up your own boards, ranging from not having to wait for shipping to just wanting to control the process yourself. Whichever camp you’re in, though, it pays to know what’s going on when your plain copper-clad board, adorned with your precious artwork, slips into the etching tank and becomes a printed circuit board. What exactly is going on in there to remove the copper? And how does the etching method affect the final product? Let’s take a look at a few of the more popular etching methods to understand the chemistry behind your boards. Quick Turn Pcb
At the end of the day, PCB etching is all about removing copper from a board in as controlled a fashion as possible. PCB etching methods generally fall into one of two broad categories: wet and dry processes. For the home gamer, dry processes would include methods like milling out traces with a CNC router, or even the tried and true method of scratching out traces using a razor blade. On a commercial level, dry etching generally refers to methods like laser etching, where a high-power laser is used to ablate copper from the underlying substrate to create traces, or plasma etching, which uses RF energy to generate a reactive plasma from an etching gas.
With the notable exception of scratching out traces with an X-Acto, these dry etching methods all have the disadvantage of needing specialized machines of some sort. What they lack in simplicity, though, they make up for in the direction of etching and the fine control they achieve in copper removal. Dry etching methods are all anisotropic processes; that is, they direct copper removal in a single direction and avoid the risk of undercutting. Wet methods, all of which rely on chemical reactions to get metallic copper into an aqueous solution, are isotropic processes, meaning that they proceed more or less evenly in all directions. This can become a problem; if the process is not tightly controlled, the etching reactions can extend underneath the resist layer masking off areas of the future traces of the PCB, potentially creating high-resistance narrowing of traces or even open circuits.
If you’ve done any PCB etching at home, chances are pretty good that you’ve at least tried the old standby, ferric chloride. It’s cheap and easy, and has a lot of advantages over other wet etching chemistries, not least of which is that you can make an almost unlimited supply of the stuff using nothing but a handful of nails and some chemicals you can easily source at a pool store and a pharmacy:
Also known as iron (III) chloride (FeCl3), ferric chloride quickly and effectively dissolves metallic copper, but what does the reaction look like? The overall reaction is pretty straightforward:
When ferric chloride comes in contact with metallic copper, one of its chlorine atoms is transferred to a copper atom, making copper (II) chloride, or cupric chloride, which is soluble in water. This allows the copper that was once bonded to the PCB substrate to be rinsed away. It seems simple enough, but that overall reaction hides a lot of chemical complexity, and the details are worth digging into a bit.
First, a bit about nomenclature. Compounds with metal cations (positively charged species) have traditionally used different suffixes to denote their oxidation state, or the charge of the atom. The “-ic” suffix denotes the higher oxidation state, while “-ous” refers to the lower oxidation state. The suffix is tacked onto the Latin prefix for the metal, yielding names such as “ferric”, referring to iron with a 3+ oxidation state, or “ferrous”, which is a 2+ state. This convention stretches back almost to the days of alchemy, and while it’s still in common use, the standard nomenclature is now to indicate the oxidation state with parenthetical Roman numerals in compound names, iron (III) chloride (FeCl3) and iron (II) chloride (FeCl2).
The nomenclature sets the stage for understanding the underlying reactions that make ferric chloride good at etching copper. In solution, ferric chloride rapidly dissociates into iron (III) and chloride ions:
Likewise, water dissociates into hydrogen and hydroxyl ions:
This results in an abundance of iron (III) ions with a strong positive charge in an environment with a lot of negatively charged hydroxyl ions. They get together and form iron (III) hydroxide, which is an insoluble compound that precipitates out of solution:
Pulling all those hydroxyl ions out of solution leaves behind a bunch of hydrogen ions, which has the effect of making the solution more acidic (decreasing its pH). This creates an environment where the iron (III) ions from equation 1 gain an electron (reduction) from the solid copper cladding on the PCB, resulting in oxidation of the copper to copper (II) ions in solution:
The copper (II) and iron (II) ions in solution are then free to glom onto all those highly electronegative chloride ions from equation 1, forming the copper (II) chloride and iron (II) chloride products on the right side of the overall equation, and leaving behind copper-free areas on the newborn PCB. The etching solution eventually becomes saturated with copper (II) oxide, which starts precipitating out of the solution as a blue-green solid. It takes a while to get there, though; depending on the strength of the etchant when fresh, you can expect it to hold up to 50 grams per liter of copper metal before it can hold no more.
Ammonium persulfate. The persulfate bit on the right is what matters; the counterion on the left could just as easily be sodium or potassium. Source: [Kemikungen], own work (public domain).Another wet etching method often used by hobbyists is the persulfate method. In general, persulfates are strong oxidizers, thanks to the oxygen-to-oxygen bond between the two sulfate groups. This makes persulfate a peroxide, like the more familiar hydrogen peroxide, where the double oxygen presents a good acceptor site for electrons.
Persulfates are usually available as salts of either sodium or ammonium, or sometimes even potassium. These positively charged species are known as counterions; when dissolved in water, persulfate salts rapidly dissociate into free persulfate ions and their counterions:
The counterions just sort of float off and don’t participate in the following etching reaction in any serious way; they just busy themselves loosely binding to the persulfate ions and falling back off in a constant dance of equilibrium. The real action is with the persulfates, which are ready to get to work on metallic copper.
Unlike with ferric chloride, the overall reaction between persulfates and copper is pretty much the whole story:
When the persulfate ions come in contact with solid copper, the metal eagerly donates electrons to the peroxide bond, reducing the bond and splitting the persulfate into two sulfate ions while solubilizing the copper. The dissolved copper then binds to one of the sulfate ions to make copper (II) sulfate, which lends the persulfate etchant solution a familiar blue-green tinge as etching proceeds.
Another etchant popular with homebrewers and commercial manufacturers alike is cupric chloride, or using the currently accepted nomenclature, copper (II) chloride. It might seem a little weird that an etchant for copper would contain copper itself, but cupric chloride etches quickly and cheaply, and has the benefit of regeneration.
While it’s possible to just buy (or make) a cupric chloride solution by treating scrap copper with hydrochloric acid, it’s easier to just throw all the ingredients together with the PCB to be etched and let the copper on the board stand in for the scrap copper. The overall reaction is pretty simple, but again, it hides some interesting chemical complexity:
Cupric chloride attacks the metallic copper on the PCB, producing two molecules of soluble cuprous chloride in the process. Pretty simple, but where does the cupric chloride come from in the first place? We need a way to dissolve a little bit of copper from the board and get it to react with some chloride ions. This is commonly done with a mixture of hydrochloric acid and hydrogen peroxide. First, the hydrogen peroxide decomposes into water and an oxygen radical, while the hydrochloric acid dissociates into hydrogen and chloride ions:
This is a pretty potent mix, with the oxygen radical and the chloride ions attacking the solid copper metal and forming a complex known as tetrachlorocuprate:
The chlorine-copper complex is capable of directly oxidizing copper, which creates the cupric chloride that will then go on and do the bulk of the etching:
The key advantage of cupric chloride etching is regeneration, which can be accomplished in a number of ways. Industrially, chlorine gas is often bubbled through the etchant; this changes the cuprous chloride back into cupric chloride without diluting the etchant, but is obviously not something that you’d want to do in the home lab. Sodium perchlorate, another strong oxidizing agent, is sometimes used industrially, but has the disadvantage of generating a sodium chloride precipitate to the etchant which needs to be removed. There are also electrolytic and electroosmotic methods that restore the cupric chloride while also recovering the metallic copper, but those are obviously complicated.
Luckily, the home gamer has a simple regeneration method available, one that uses chemicals that we’ve already added to get the reaction started: hydrochloric acid and peroxide:
Oxidizing cuprous chloride with hydrogen peroxide in the presence of chloride ions from hydrochloric acid effectively resets the etching solution, restoring the cupric chloride and making the solution ready for another go at the solid copper metal. This does produce water molecules, though, so dilution is a problem, but that can be compensated for to some degree by adding more acid. Still, it’s a pretty neat system, a nearly closed-loop process that’s cheap and simple.
There are obviously a lot of details missing from this quick tour, and there are a ton of other etching methods I haven’t covered. But whichever one you choose to use, make sure you take the proper precautions, wear your PPE, and have a plan for what you’re going to do with the waste.
Have a plan for what you are going to do with the waste?! That’s a bit of a throwaway line isn’t it — I have yet to find a way to dispose of used etchant in my part of the UK, currently I just store it in labelled bottles. Less than ideal. Open to any suggestions.
You can just neutralise and dump the precipitate.
Dumping copper is illegal in at least some of the European jurisdictions. It is apparently somewhat toxic.
Copper carbonate is fairly benign and insoluble so it’s hardly that dangerous, especially in small amounts. It’s probably safer than putting any copper metal or alloy (like an old plumbing fitting) in the bin.
I’ve seen some suggest mixing old etchant with plaster. Neutralizes the acid, locks it up in a big chunk that you can dispose of in the trash in many places.
The worst thing you can do is what people used to do until the late 1990s — pour it down the drain. I shudder to think of all the photo-chemistry I put indirectly into the groundwater.
(Sorry, future generations! We didn’t know any better.)
Dumping heavy metals like copper is illegal in the USA and I’m sure it’s also illegal in the EU.
You cant dump anything with copper so you’ve to get the copper back. There are tons of methods for this depending on the etchant. https://howtodispose.info/how-to-dispose-of-ferric-chloride/ is for ferric chloride (as the hyperlink suggests) but there are more on the same site
Terrific, separate out a noxious sludge and send that sludge to landfill /s. I might as well just send the bottle as a whole to landfill on that basis.
That would probably be mostly fine as the landfill is isolated and the copper won’t leak into the ground water. Some states have waste collection yards where you just drop the used etchant and somebody will presumably do something sane (but definitely legal) with it on your behalf. Sometimes you need to pay a small fee, but not usually when you are local. Municipalities tend to run them to prevent illegal dumping.
Nurdrage did a video on ferric chloride recovery :)
https://youtu.be/CY2T3orVuFU
Honestly, just use it as weed killer. Stops things from growing through your driveway.
The low amounts from a few circuitboards, assuming you aren’t doing industrial-scale etching, are pretty much harmless. More copper ions will be released to the environment over time from a lost penny, if dropped in a suitably corrosive environment. At 35um thickness, a cm2 etched away is about 31 mg of metallic copper. Not so much.
A lot of copper is released from sheetmetal in general outdoors use. For ballpark figures of corrosion rates in marine service, see here: https://copper.org/publications/pub_list/pdf/A7032-seawater-corrosion.pdf
If still worried, reduce the issue and electroplate the copper off the solution onto something. Nice exercise in electrochemistry. Iron anode, copper cathode. Electrochem-fu is woefully underestimated these days, all sorts of chemicals can be made with electricity, sometimes even in somewhat convenient way.
Or let the solution evaporate into smaller volume or even into a dry material, put it into a much smaller bottle, hide it in the back of the cellar and forget about it.
Modern U.S. pennies are only 2.5% copper: 62 mg per 2.5 g coin.
Good point. Make it 40 cents then. In pennies.
Here is a totaly unthought out solution. Try to electroplate the copper back onto some of the traces of the PC board to make them thicker and carry more current.
When I made my own PCBs at home I used to regenerate the ferric chloride using hydrogen peroxide and hydrochloric acid. I ended up with a mixture of ferric chloride and cupric chloride which is quite a good etchant as mentioned.
Hydrogen Peroxide + Hydrochloric Acid is an excellent etchant in its own right – why contaminate it with ferric chloride?
Because I could reuse it. Hydrogen chloride and hydrogen peroxide can only be used once.
When regenerating cupric chloride, you can totally skip the hydrogen peroxide if you’re willing to substitute it with time. Simply use an aquarium pump to bubble air into the solution for a few days to regenerate it. This also has the added benefit of not needlessly diluting your etchant.
If the acid is strong enough, this can also fume, and the fumes rust nearby metals quite aggressively.
It can even do so if you have it in a non-airtight container. I had an IKEA sandwich box that wasn’t as well sealed as I had hoped — all the USB cables on the shelf, as well as one of the hinges on the door, were ruined.
Hydrogen peroxide is just so convenient if you have a source of 10%. Make friends with a hair stylist.
(I regenerated with air for years. It works too.)
I’ve been using the cupric chloride etchant since 2016, and I’m still using the same bottle initially made with copper, hydrochloric acid and hydrogen peroxide. I etched hundreds of PCBs with it.
It’s also easy to debug by just looking at the solution color. If it’s bright green, it’s good. When it becomes dark it’s time to add around one milliliter of hydrogen peroxide, and if after the addition it does not become green again, it’s time to add more hydrochloric acid. Hydrogen peroxide needs to be added practically every time a PCB is made, while hydrochloric acid only infrequently.
Due to the additions, it increases in volume over time. When it fills the bottle you can give the excess to a friend, or dispose of it.
Disposal is also easy, just dilute the cupric chloride and add sodium bicarbonate slowly until the solution becomes clear. A precipitate of copper hydroxide will form which is a naturally occurring mineral and can thus be thrown in the trash, while the clear solution is free of copper ions and can be poured down the drain.
The only issue for beginners is kickstarting the first batch. I found that if the reagents are too dilute the solution stays blue and does not work as an etchant. Only the green solution contains the tetrachlorocuprate ion that is active towards copper metal.
Crude oil is also a 100% natural product, but that does not mean it’s good to go dumping it in the sea somewhere.
Arsenic (Atomic number 33) is also an element and naturally occuring. Same for Asbestos.
Wikipeda has a link to an SDS (Safety Data Sheet) and although this copper hydroxide is not the most poisonous of things, you should not eat it or put it in your eyes, and waste disposal is regulated too. https://en.wikipedia.org/wiki/Copper(II)_hydroxide
Crude oil leaks out of fractures in the seabed. Nature just deals with it. Bacteria eat it.
This article wildly misunderstands the chemistry. A solution of ferric chloride is stable. I literally did this yesterday. It does not spontaneously precipitate ferric hydroxide. That would generate HCl as a byproduct. HCl reacts with ferric hydroxide to give you water and ferric chloride. You just need to skip right to equation 4. It’s a simple redox reaction converting metallic copper to soluble copper salt.
There are also etchants based on chlorates. I think they were favored in printing industry as they etched nice and clear.
Chlorates can be made in situ by electrolysis in a chlorate cell.
I wonder if we could have a closed cycle, no-logistics-needed, etch system possibly with online regeneration of the chlorate and removal of copper.
I’ve been using ferric chloride in the past, it’s a real PITA. Then I started to use H2O2 (3%) + citric acid + table salt and it changed my life. (my source is a comment comment in video https://www.youtube.com/watch?v=6uInan-TjiA issued by YuriyYarosh). The chemicals are easy to get in many countries, and it feels very safe to me. I’m not sure what gas it generates, I guess this is H2, anyway I always keep the room ventilated. Etching time 20-30mins, not as fast as some methods but the ratio time/convenience is good to me. I never read about this method put aside the source cited above, and that’s why I’m writing this comment. I’d be interested in any info to complete the cited source (one equation is missing I guess, and obviously nothing is said about disposal…)
I’d be concerned about that etch time as longer etch times are associated with undercutting. If it’s working for the boards you’re etching though…
The problem with Ferric Chloride as an etchant isn’t the Ferric Chloride itself. It’s the cupric chloride that gets deposited into it. Ferric Chloride is used in sewage and wastewater treatment as a coagulent so there are no major water quality concerns about dumping it down the sink. Its corrosive qualities however could be a problem for pipework. None of that is any different to your organic solution either – you end up with an acidic solution of copper salts too. You can deal with the acidity easily enough by diluting or neutralizing it, but the copper remains a problem.
Putting it down the sink isn’t really an option. IIRC, the EPA limit for copper in wastewater disposal is 0.25mg/L, so for a 3″x4″ dual sided board of 1oz/ft^2 etched 50% away, that’s 1/12*28g*2*0.5, or about 2.3g of copper which would result in 3.5g of cupric chloride. You’d need to dilute that with 9200L (about 2400G) of water to get under that limit. Around here that’d cost about $23 for the water, and another $47 for the associated sewage charge.
Putting it down a storm drain is an even worse proposition. At least wastewater is treated, and the treatment will remove the copper. Storm drains empty to rivers or oceans where the copper is toxic to marine life.
All of the chemistries in this article are similar in that all are relatively safe to handle, and all result in copper salts that need to be disposed of responsibly. You could etch with coca cola and salt too, with much the same result.
Use more ground pour, that lowers the amount of copper to etch and saves etchant.
Calculate the dilution factor not for the amount to dispose itself, but average it through household consumption. Then you can easily get below the limit without any effort and added cost.
Average American family uses 300 gallons of water per day, so one board according to your calculations can be etched and etchant fully “downdrainized” once per 8 days.
I Wish you would wrote more articles about, whats Happen behind. To Hack or improve Something you first have to understand what happens there. And normally a Site Like this should Deliver the Readers about good sources. So if a Reader Hacks or improves Something in a innovative way, than you can write an Article and earn your Money with it. But First Set the seed with knowledge and the Innovation will flow.
What’s with the weird capitalizations?
The constant wrong autocorrectur from google chrome browser.
You might want to check your settings. It normally doesn’t autocapitalize random words, just recognized proper nouns and the start of a new sentence.
If you don’t recall reconfiguring it, there may be some unintended and potentially harmful software installed…
Commercially, when etching PCBs with ammonia, the sweet spot is always to be anisotropic, but in fact the ammonia always makes it isotropic. But thats why we compensate the pattern, so the average is where the line should run.
Please be kind and respectful to help make the comments section excellent. (Comment Policy)
This site uses Akismet to reduce spam. Learn how your comment data is processed.
China Pcb Copper Board By using our website and services, you expressly agree to the placement of our performance, functionality and advertising cookies. Learn more